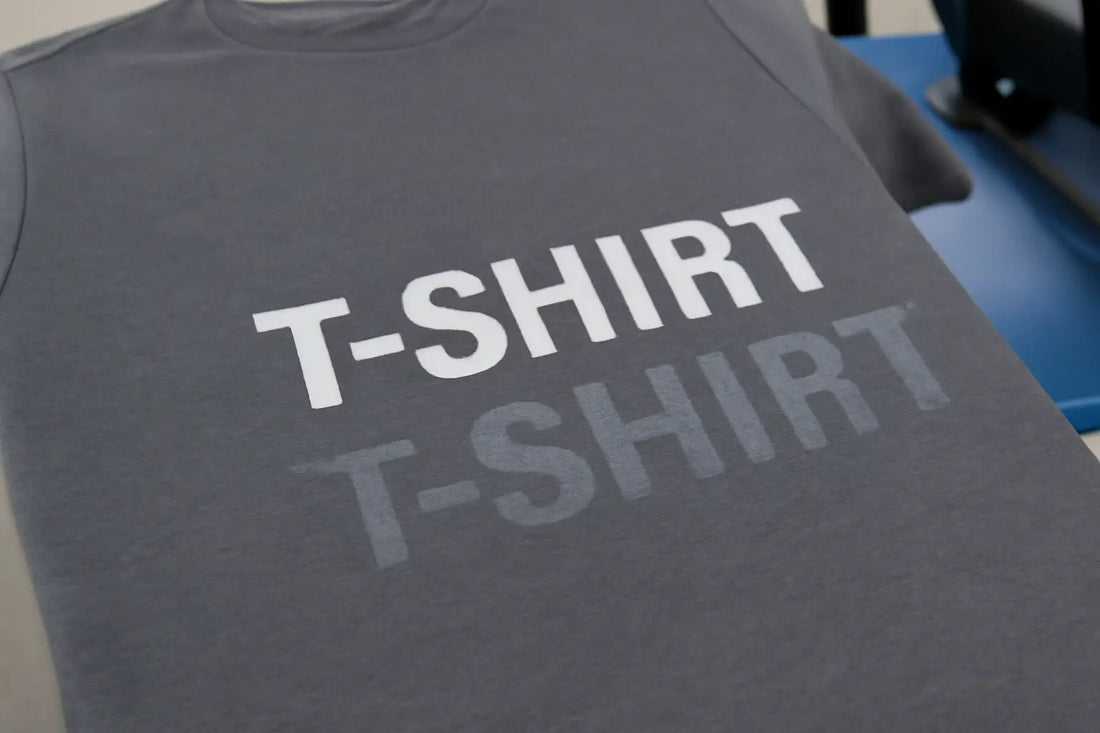
If you've ever pressed a shiny DTF transfer only to reveal a faint double image, congratulations, you've encountered the dreaded ghosting in DTF transfers. This subtle ghost effect in DTF printing makes your design look blurry and cheap, even if it wasn’t at print time. But don’t worry, ghosting is fixable, and this guide walks you through how to prevent it.
What Causes Ghosting in DTF Transfers?
Understanding the causes of ghosting in DTF helps you engineer the fix. Here's what most commonly leads to this problem:
- DTF heat press alignment issues: Misaligned film or shifting during press causes ghost images.
- Too much pressure or movement mid press: Even a slight nudge before releasing can create a double image.
- Incorrect timing or temperature: Peeling too early or late, or inconsistent heat, locks in imperfections.
- Film static or curling: Static electricity lifts sections of film, causing misplacement. Flat, compact layouts from a gang sheet builder also cut down curling edges that often cause static misplacement.
- Powder not fully cured: Partially cured adhesive allows the design to shift during pressing.
How to Fix Ghosting in DTF
Applying these DTF ghosting troubleshooting tips will help you solve ghosting once and for all:
- Calibrate your heat press alignment: Double check both platen and transfer are square. Use guides or T squares if needed.
- Secure the film before pressing: Tape your DTF transfer edges using heat resistant film or heat resistant tape.
- Set the best settings to prevent DTF ghosting: Ideal temperature is typically 300–320°F. Press for 10–15 seconds under firm pressure.
- Peel correctly for your film type: For hot peel, wait 5 to 10 seconds. For cold peel, allow full cool down or use a cooling fan.
- Reduce static build up: Use an anti static spray or foam liner to stop film potential jumping during pressing.
Common DTF Transfer Printing Mistakes to Avoid
Even minor missteps can cause ghosting. Pay attention to these DTF transfer printing mistakes:
- Relying on pressure alone, use alignment tools.
- Pressing wet or crumpled fabrics, pre press to remove moisture and wrinkles.
- Neglecting to tape minute edges, this one prevents most ghosting failures.
- Peeling too fast without testing times, test once and stick to it.
Best Practices for Sharp Prints
Prevent ghosting by maintaining disciplined, consistent routines:
- Keep heat press clean and calibrated to avoid misalignment.
- Label press settings for each transfer type to reduce human error.
- Equip your workspace with alignment tools and anti static materials.
- Track your success, note which combos of temp, time, and pressure yield zero ghosting.
Conclusion
Ghosting in DTF transfers doesn’t have to be your norm. By tuning your setup and adopting precision in your process, you’ll see crisp, professional results that elevate every print. At DTF Gang Roll, we know how frustrating those double images can be, that’s why we stand by smart solutions and proven methods.
Fix these issues with the above DTF transfer ghosting fix techniques, and your prints will stay sharp, confident, and ghost free!
Frequently Asked Questions
1. What causes DTF print ghosting issues?
Ghosting stems from misalignment during pressing, static buildup, under cured powder, and incorrect timing or pressure settings.
2. How to fix ghosting in DTF transfers?
Tape edges, align precisely, cure powder fully, and follow hot or cold peel timing carefully to eliminate ghost images.
3. How to avoid DTF ghosting altogether?
Keep your press square, use anti static tools, and label heat/time settings. Small steps ensure you avoid DTF ghosting every print.
4. What are the best settings to prevent DTF ghosting?
Generally, use 300 to 320°F, 10 to 15 second press, proper pressure, and full cooling or timed peel for a clean print.
5. How do I fix a double image in DTF?
Realign your transfer, retape edges, and repress before peeling. Correct dtf print alignment issues and timing fix most fixing double image in DTF issues.